WhistlePig Toys
Not as Boring as Homework!
Flying your glider requires both Art and Science. The Art is in how you use your hands to push the glider into the air. The Science is in adjusting the glider so that it flies the way you want it to once it has left your hand.
First check your glider over. Hold it at arms length and look at it from the front. The fin should be straight up. The tips of the wings should be higher than the middle, and equal. The stabilizer should be perpendicular to the fin.
Check the balance. This is very important. The balance point is called the Center of Gravity, or the CG, for short. It is marked on the fuselage with a symbol like this:

The plane should balance at this point without tipping nose up or nose down.
For planes with the big wing in the front, you can check the balance by holding the plane under the wings with one finger on each side of the fuselage. Make sure they are in the same place front and back.
For planes with the wing in the back, balance the plane on its side on the edge of a ruler, with the nose on one side of the ruler, and the tail on the other.
You can build a gadget to help with balancing if you want. It's easy, and the plans are free!
If the place the plane balances is in front of the CG symbol, the plane is nose heavy, so add a little bit of clay to the tail. If it is behind the CG symbol, the plane is tail heavy, so add a little bit of clay to the nose. Adjust until the balance point is in the middle of the CG symbol.
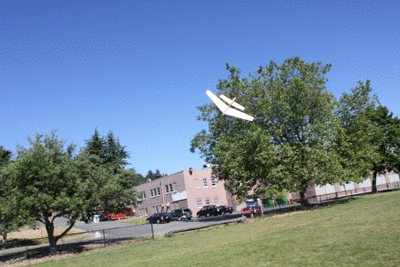
Find a good place to fly. These gliders do best in the back yard without too much wind. An indoor basketball court is a good spot too.
Hold the glider with thumb-and-forefinger at the CG marking on the fuselage. Point the glider away from you and in a safe direction. Hold it gently. Raise it to eye level, keeping your forearm vertical. Make sure the wings are level. Bring the plane back towards you by bending your elbow only, then throw the same way - elbow only. The glider should fly straight away from you. If it falls to the ground, throw a little harder. If it tries to loop-the-loop, throw a little less hard. If it slams into the ground, you held on too long.
It's worthwhile to practice a bit until you get a good flight every time, even if the plane wants to curve to the left or to the right.
If the plane always turns one direction or the other, check it for warps. Hold it up at arms length so that you can see only the edge of one wing. By moving only your eyes, look at the other wing. Can you see the top or bottom of the wing, or just the edge? If you can see the bottom of the wing, chances are it was turning away from that wing. If you can see the top, chances are it was turning towards it.
To correct a warp, twist the wing gently and breathe on it. Check the warp and repeat as necessary.
Once your glider is flying consistently, try some stunts!
With the wings level, aim a little bit below level, and throw hard! Remember to keep the wings level. It's easy to snap your wrist and make the plane go haywire, so remember what you've practiced.
Hold the plane as usual, but this time with one wing down. Throw the plane a little harder than usual, and it will curve around. With a little practice you can catch it.
Just like a loop, but don't throw quite so hard. Throw just hard enough that the plane stops when it's going straight up. It with either fall over forwards, backwards or sideways. If you start the throw with one wing down a little bit, you can make it fall off on one wing. With practice the plane will come back to you!
Practice makes better, so be sure to practice a lot!